Add Row
Add Element
cropper
update
Home Fix Channel
update
Add Element
  • Home
  • Categories
    • Industry Trends
    • Technology
    • Industry news
    • Consumer Reviews
    • Home Services Tips and Advice
    • Home Improvement scams
    • Home Renovation
    • Home Improvement
February 27.2025
2 Minutes Read

How to Remove Haze from Engineered Hardwood Floors: Achieve a Sparkling Shine!

Hand cleaning haze from engineered hardwood floor with cloth


Understanding the Haze Dilemma on Engineered Hardwood Floors

Engineered hardwood floors are more than just a trendy choice for modern homeowners; they are a testament to comfort and style. Yet, even with their numerous benefits, there's a common adversary that haunts many owners: haze. This unsightly film can dull the beautiful finish and diminish the aesthetic appeal of your floors.

Why Does Haze Form on Your Floors?

Over time, your engineered wood floors may develop a hazy appearance due to several factors:

  • Inappropriate Cleaning Solutions: The most significant culprit is usually the cleaning products we use. Some products, especially those containing wax or harsh chemicals, can leave a film that contributes to the haze.

  • Overzealous Water Usage: While cleaning requires a bit of water, too much can seep into your floors, particularly if they aren’t sealed adequately. Excess moisture can lead to unsightly results.

  • Improper Finishing: A poorly applied finish can fail to seal the wood completely, resulting in a haze that can be time-consuming to fix.

Removing Haze from Engineered Hardwood Floors

Don’t despair if your floors are showing signs of haziness. Here’s a step-by-step guide to restore their glory:

  1. Dust First: Begin by vacuuming or sweeping to remove loose debris. This step prevents scratching during the cleaning process.

  2. Mix Your Cleaning Solution: A common and effective remedy involves a simple vinegar mixture. Combine equal parts water and white vinegar in a bucket.

  3. Apply the Solution: Use a damp cloth or flat mop to gently apply the cleaning solution to the floors, wiping in the direction of the grain.

  4. Rinse: After applying your vinegar mixture, rinse your cloth or mop and go over the area with clean water to remove any residue.

  5. Dry: Quickly dry the area with a soft, dry cloth or mop to prevent moisture from settling back into the floors.

Preventing Future Haze

Once you've conquered the haze, implement the following practices to keep your floors looking radiant:

  • Use pH-neutral cleaners that are safe for wooden surfaces.

  • Minimize water exposure: Always use a slightly damp mop rather than soaking wet tools.

  • Regular cleaning: Develop a routine of sweeping and light cleaning to prevent build up.

Haze on engineered hardwood floors can be an eyesore, but with a bit of care and knowledge, you can restore your floors to their original splendor. Regular maintenance combined with appropriate cleaning techniques will ensure that your investment shines bright for years to come.


Home Improvement

Write A Comment

*
*
Related Posts All Posts

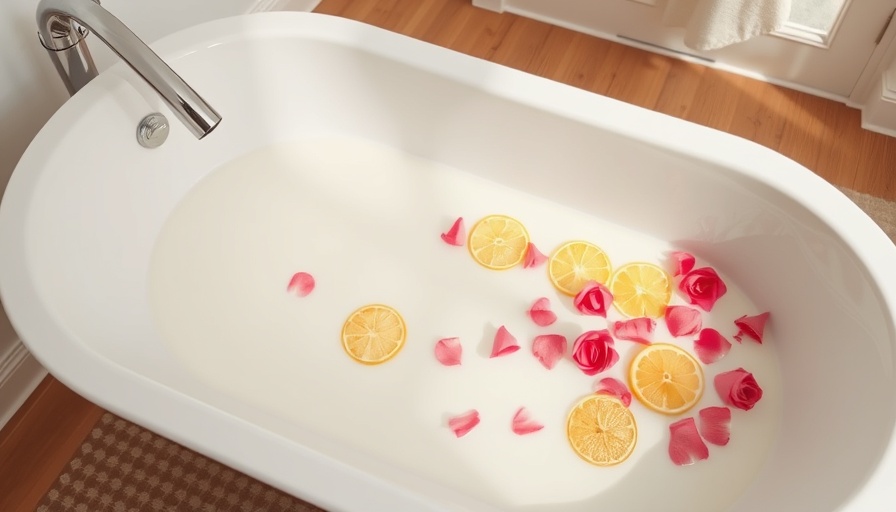
Discover 15 Easy Homemade Milk Bath Recipes for Soft, Radiant Skin

Update Transform Your Skin with Luxurious Milk Baths Are you tired of battling dry, rough skin? If so, a milk bath might just be the pampering remedy you need. Handcrafted from simple, natural ingredients found in your own home, milk baths deliver deep hydration while providing a soothing experience. But the benefits of these milky soaks extend beyond mere softness; they can also offer relief from skin irritations like eczema, rashes, and even sunburns. Why Soak in Milk? Milk baths are rather magical, not just because they smell divine but due to their potent hydrating properties. The fats and proteins in milk nourish the skin, leaving it soft and supple. Commonly used ingredients, from coconut oil to oats, enhance these benefits, ensuring your bathing experience is as effective as it is luxurious. Top Homemade Milk Bath Recipes Let’s dive into a couple of easy, homemade recipes that can transform a regular bath into a spa-like experience. Coconut Oil Milk Bath This recipe is straightforward and effective. Combine 1 ½ cups of powdered milk with ½ cup of baking soda and 15 drops of coconut oil for an ultra-hydrating soak. Just mix, store in an airtight container, and use ½ to 1 cup per bath! Vanilla, Rose, and Salt Milk Bath A sophisticated blend designed to pamper your skin, this bath combines soothing oats with nourishing buttermilk. You’ll need 1 cup of baking soda and ½ cup of powdered buttermilk, along with luxurious ingredients like cocoa butter and rose petals. The aroma of vanilla will elevate your mood, while your skin glows. Unlock the Secrets of Soft, Glowing Skin Investing time into self-care can yield beautiful results, not just in skin health but also in mental well-being. As you soak away your stresses, remember that simple ingredients can offer profound nourishment to your skin. With these 15 easy recipes, you'll have a variety of options to soothe and hydrate, ensuring that your skin looks as fabulous as you feel. Join the home improvement movement by equipping your bathroom with these DIY milk bath techniques that promise luxurious skin care without breaking the bank. Find joy in small steps toward revitalized skin.

Elevate Your Property Value: 5 Smart Home Improvements

Update Boost Your Home’s Value with Smart Improvements In a time when homes are more than just places to live, making smart upgrades can significantly amplify your property's value. Home improvement companies, C-level executives, and small business owners in the home services industry are increasingly recognizing the impact of intelligent renovations. From energy-efficient windows to modern kitchens, these enhancements not only create a welcoming environment but also appeal to potential buyers. 1. Smart Thermostats: Control from Anywhere No more manual thermostat adjustments! Installing a smart thermostat—like a Nest or Ecobee—allows homeowners to manage their home’s temperature remotely using their smartphones. This affordable upgrade doesn't just provide ease; it also signifies modern living and can help reduce energy consumption—a big plus for eco-conscious buyers! 2. Kitchen Revamps: Small Upgrades, Big Impact The kitchen is often the heart of the home, and improving it doesn’t have to mean a full remodel. Simple fixes like new cabinet handles or a trendy backsplash can elevate the space dramatically. Studies show that minor kitchen renovations yield up to an 80% return on investment, making even small efforts worthwhile! 3. Curb Appeal with Smart Landscaping First impressions matter, and a beautifully landscaped yard does just that. Adding elements like smart outdoor lighting or irrigation systems can give your home's exterior a polished look while ensuring it remains low maintenance. Imagine guests being greeted by auto-lit pathways and perfectly maintained gardens! 4. Utilizing Extra Space: Basements and Attics Transforming basements or attics into usable living space can drastically increase your property’s square footage and value. Whether it's an office, guest room, or gym, finished spaces attract buyers. A bit of insulation and drywall can go a long way, especially in urban areas where space is at a premium. 5. Energy-Efficient Windows and Doors Upgrading to energy-efficient windows and doors might seem minor, but these improvements can drastically reduce utility bills. Homebuyers are increasingly drawn to ENERGY STAR-rated models, as they promise lower costs and enhanced sustainability. Plus, they bring a fresh modern look to both the interior and exterior of the home. Final Thoughts For those in the home improvement sector, understanding the value these upgrades provide is essential as homeowners seek investments that benefit both their lifestyles and their home’s resale value. Stay engaged with modern trends and offer your clients advice on implementing these smart improvements. After all, a value-boosting project today sets the stage for a lucrative sale tomorrow!

Water Heater Wisdom: How Does a Water Heater Work?

Update Unlocking the Heat: How a Water Heater Really WorksHave you ever turned on the tap for a warm shower and wondered where that hot water is coming from? A **water heater** is the unsung hero of our homes, ensuring we have hot water ready whenever we need it. From top to bottom, the inner workings of water heaters are a blend of engineering and practicality, operating seamlessly to provide comfort in our daily lives. The Heart of the Home: Understanding Water Heater ComponentsThough most simply see a water heater as a tank tucked away in a closet or garage, it’s essential to understand the crucial components that keep it ticking. Typically, the two most common types are gas and electric water heaters. Each type houses vital parts that play specific roles:Tank: This is where it all begins—a sturdy shell that stores hot water. The tank’s capacity can vary, and selecting the right size based on your family’s needs is crucial.Thermostat: This handy device checks the water temperature, allowing you to control heating levels. Keeping it at the right setting can preserve energy and prevent scalding.Shut-off Valve: Located outside the unit, this valve helps control water flow, which can be particularly useful during emergency repairs.Heat-out Pipe: This is how hot water escapes the tank. Positioned atop the tank, it channels warm water to your sink, shower, and appliances.Heating Mechanism: Irrespective of whether it's electric coils or a gas burner, the heat source is what brings your water to the perfect temperature.Pressure Relief Valve: Safety is paramount! This valve ensures that water pressure remains optimal, avoiding hazards that can arise from excess pressure buildup.The Heating Process SimplifiedSo, how does it all function together? When you turn on the hot water tap, the cold water enters the tank, where it's heated by the heating element. As the temperature rises, hot water rises to the top of the tank and exits through the heat-out pipe. By maintaining the right balance of pressure and temperature, your water heater keeps a consistent supply of hot water available for your household needs.For homeowners and small business owners alike in the home services sector, knowing how a water heater works can aid in effective maintenance and troubleshooting. This knowledge empowers you to address minor issues and consider regular checks—an important aspect of good home maintenance!Conclusion: Keeping Your Hot Water FlowingUnderstanding your water heater means understanding the backbone of comfort in your home. Keeping up-to-date with regular maintenance and being aware of your unit’s functionality not only enhances your water heating experience but also contributes to efficient energy use. As you dive deeper into home improvement, remember—you’re bringing warmth into more than just your water!

Terms of Service

Privacy Policy

Core Modal Title

Sorry, no results found

You Might Find These Articles Interesting

T
Please Check Your Email
We Will Be Following Up Shortly
*
*
*