Add Row
Add Element
cropper
update
Home Fix Channel
update
Add Element
  • Home
  • Categories
    • Industry Trends
    • Technology
    • Industry news
    • Consumer Reviews
    • Home Services Tips and Advice
    • Home Improvement scams
    • Home Renovation
    • Home Improvement
March 23.2025
2 Minutes Read

Keep Your Home Spotless: Step-By-Step Guide to Cleaning a Shark Vacuum

Disassembled Shark vacuum parts showing cleaning process.

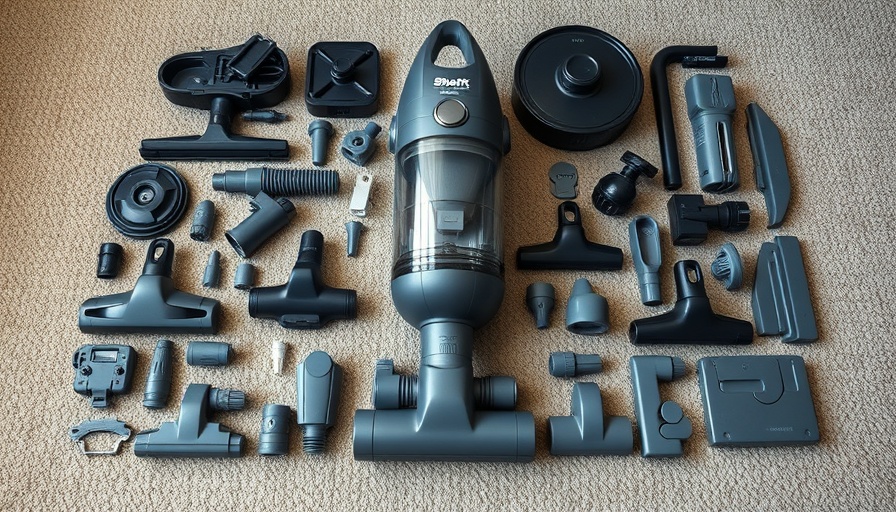
Why Cleaning Your Shark Vacuum is Essential

As the trusted cleaning companion of many households, a Shark vacuum cleaner is a savvy investment for keeping those carpets and floors spotless. But just like any beloved tool, it requires a little TLC to perform at its best. Regular upkeep not only maximizes its lifespan but also boosts its suction power and eliminates any lingering dirty odors. When done properly, cleaning your Shark vacuum can transform it back into the efficient cleaning machine you once loved.

Simple Supplies Needed for the Job

You need to gather a few household items before diving into the cleaning process. You'll want:

  • Microfiber cloths
  • A larger bowl or sink
  • A trash can
  • A soft-bristled nylon brush
  • Gloves to protect your hands
  • A drying rack
  • A seam ripper or small scissors

These easy-to-find tools will make your cleaning job a breeze!

Step-By-Step Instructions for a Turbo-Charged Clean

Ready to work your magic? Start by unplugging your vacuum for safety. Take it outside to give it a good shake and release all those dust bunnies!

Step 1: Inspect and Tackle the Roller Brush

Your vacuum’s roller brush is where the magic happens, but it can quickly become cluttered with hair and debris. Remove the brush head gently; press the push button designed for easy detachment. After removing it, inspect closely for dirt, hair, and other messes. Use scissors or a brush to detach any tangles, and give it a rinse if necessary. Make sure it dries completely before reattaching!

Step 2: Clean the Dust Collection Cup or Bin

Next, it’s time to tackle the dust collection cup or bin. Empty it into your trash can and, if necessary, wash it with mild soap and water. Be sure to let it dry completely as well before putting it back into the vacuum. A clean bin ensures your vacuum runs efficiently and collects dirt like a pro!

Your Vacuum Deserves a Little Love!

In conclusion, taking just a bit of time each month (or every few uses) to clean your Shark vacuum cleaner will not only enhance its performance but also extend its life. Your home deserves clean floors, and a robust vacuum can help make that happen! To keep things fresh and efficient, consider incorporating a regular maintenance routine into your home care checklist. Dive in, make the cleaning process fun, and remember: a happy vacuum means a happy home!

Home Improvement

Write A Comment

*
*
Related Posts All Posts

Transform Your Home: When Is It Time to Replace Your Driveway?

Update Is It Time to Say Goodbye to Your Driveway?In the bustling world of home improvement, every detail matters—especially your driveway. More than just a parking space, a driveway enhances your home’s first impression and can significantly impact property value and safety. But like a favorite pair of shoes, wear and tear is inevitable.Understanding Driveway DeteriorationFor homeowners and contractors alike, recognizing when repairs are insufficient is crucial. Michigan's unpredictable climate compounds the challenges faced by concrete driveways. The freeze-thaw cycles cause surfaces to expand and contract, leading to cracks, stains, and even structural erosion.The Tell-Tale SignsKeep an eye out for persistent issues such as cracks that reappear or deepen despite patch efforts. A drive that holds water or has damp spots not only disrupts its aesthetic but signals poor drainage that can affect your home's foundation. That unsightly spalling from de-icing salts? It's not just cosmetic; it points to deeper problems requiring fresh concrete designed to withstand harsh winters.Crafting Curb AppealA worn-out driveway doesn’t just hurt functionality; it impacts curb appeal too. Revamping with a stylish design or contemporary finish delivers dual benefits: enhanced aesthetics and increased property value. Upgrading your driveway can breathe new life into your home and create a welcoming vibe.What to Consider Before ReplacementBefore deciding on a complete replacement, consult with reliable concrete contractors in your area. Their expertise can guide you through options like resurfacing or installing air-entrained concrete, engineered for Michigan's demanding weather. They can also assist in ensuring proper drainage, preventing similar issues in the future.Time to Upgrade?In conclusion, understanding the signs that your driveway may need replacement is the first step toward enhancing your home's safety and charm. A well-maintained driveway is more than a functional space; it’s a smart investment in your property’s future. Ready to elevate your home’s curb appeal? Consider consulting professionals in home improvement today to get started on your driveway upgrade. It's time to transform your home into the envy of the neighborhood!

Explore Essential Hardwood Floor Underlayment Options for Your Project

Update Understanding Hardwood Floor UnderlaymentChoosing the right hardwood floor underlayment can mean the difference between a flooring experience that’s comfortable and sound-dampening, and one that echoes every footstep. If you're a home improvement enthusiast or a business owner in the renovation industry, finding suitable underlayment options is crucial not only for customer satisfaction but also for longevity in flooring.Comparing Underlayment OptionsEach underlayment type offers unique benefits to cater to different flooring materials and environments. For instance, the TrafficMASTER Polyethylene Foam is budget-friendly and lightweight, making it an attractive option for homes with a focus on savings without sacrificing quality.Meanwhile, the Roberts AirGuard Floor Underlayment is praised for its durability and cushioning properties, making it the go-to for those installing laminate flooring. It supports walking comfort without compromising structural integrity, which is essential for retaining happy customers.Prioritizing Moisture ControlMoisture can wreak havoc on flooring, and choosing the appropriate underlayment can mitigate these issues. The DMX 1 Step 2.0 Underlayment offers excellent moisture resistance when paired with vinyl planks and is ideal for basements or bathrooms where humidity can be high.Exploring Additional Premium OptionsLastly, the Eco Cork Foam Premium Underlayment stands out as an eco-friendly choice. Its antimicrobial features make it perfect for areas with heavy foot traffic, appealing to both environmentally-conscious homeowners and contractors looking for sustainable materials.Final Thoughts and ImplementationUnderstanding these options and the benefits they provide is key to enhancing customer satisfaction and driving sales in the home improvement sector. Consider sharing these insights through marketing strategies, as educating your clientele about the importance of proper underlayment can lead to better buying decisions.

Perfect Your Kitchen: Discover the Ideal Cabinet Height for Functionality

Update Why Kitchen Cabinet Height Matters Are you entering the realm of home improvement and considering a kitchen remodel? A crucial aspect to contemplate is the height of your kitchen cabinets. Not only does this detail influence the function of your space, but it significantly impacts the room's aesthetics. If you're looking to achieve that polished, modern kitchen vibe, understanding the ideal cabinet height should remain at the forefront of your remodel planning. Understanding Standard Kitchen Cabinet Heights The standard height for kitchen cabinets is set around 54 inches, which is composed of a base cabinet height of 34.5 inches and an additional 18 inches for the placement of wall cabinets above the countertops. This formula ensures that popular kitchen fixtures like stoves and sinks are easily accessible and aligns with the ergonomics that today’s homeowners need. Factors that Affect Cabinet Heights While the standard height gives a solid foundation, various factors can adjust this number to better accommodate personal needs and kitchen layouts. Here are a few key contributors: Base Height: The base of cabinets can differ; higher bases naturally push the upper cabinets higher. Ensure there’s a clean visual flow between the upper cabinets and the ceiling. Countertop Thickness: The thicker the countertop, the more height you may need between the upper cabinets and the countertop itself. Cooking Range Safety: Adequate spacing between the stove and upper cabinets is critical for safety and prevents potential fire hazards. Your Family's Needs and Kitchen Functionality Family members’ heights and accessibility needs should play a role in cabinet height considerations. Adjusting the measurements in alignment with who will be using the kitchen will create a more user-friendly environment. This personal touch not only enhances functionality but can delight the various users of the space every day. Conclusion: Elevating Your Kitchen Experience Getting the kitchen cabinet height right isn’t just about adhering to standards; it’s about creating a space that feels tailored to you. Consider all the factors mentioned to design a kitchen that’s not only stylish but practical. For more expert advice on home improvement and services, reach out to professionals who can guide you through your renovation journey!

Terms of Service

Privacy Policy

Core Modal Title

Sorry, no results found

You Might Find These Articles Interesting

T
Please Check Your Email
We Will Be Following Up Shortly
*
*
*